Web Installer Wizard
Overview
WaDesk ships with a built-in, browser-based install wizard. After you upload the files and create a database, just visit your domain — the first request is automatically redirected to /install, where a guided eight-step wizard sets everything up for you.
The wizard writes your configuration file, creates the database tables, loads the default data the admin console needs (roles, plans, currencies, payment gateways, the in-app guidebook), creates your first super-admin account with a private workspace, and finally locks itself so it can never be re-run on a live install.
No command line needed. The whole flow happens in the browser. The only prerequisite is that your server meets the Server Requirements and you have empty-database credentials ready.
Before You Begin
Have these ready before you open the wizard:
- An empty MySQL 8 database plus a user with full privileges on it.
- Your public URL (for example
https://app.example.com) — the wizard saves this as the application URL. - The email and password you want for the first admin account.
- Write access to
storage/,bootstrap/cache/, and the project root (so the installer can write.env).
Then point your browser at your domain. A fresh install detects that it is not yet set up and redirects you straight to the Welcome screen.
Step 1 — Welcome
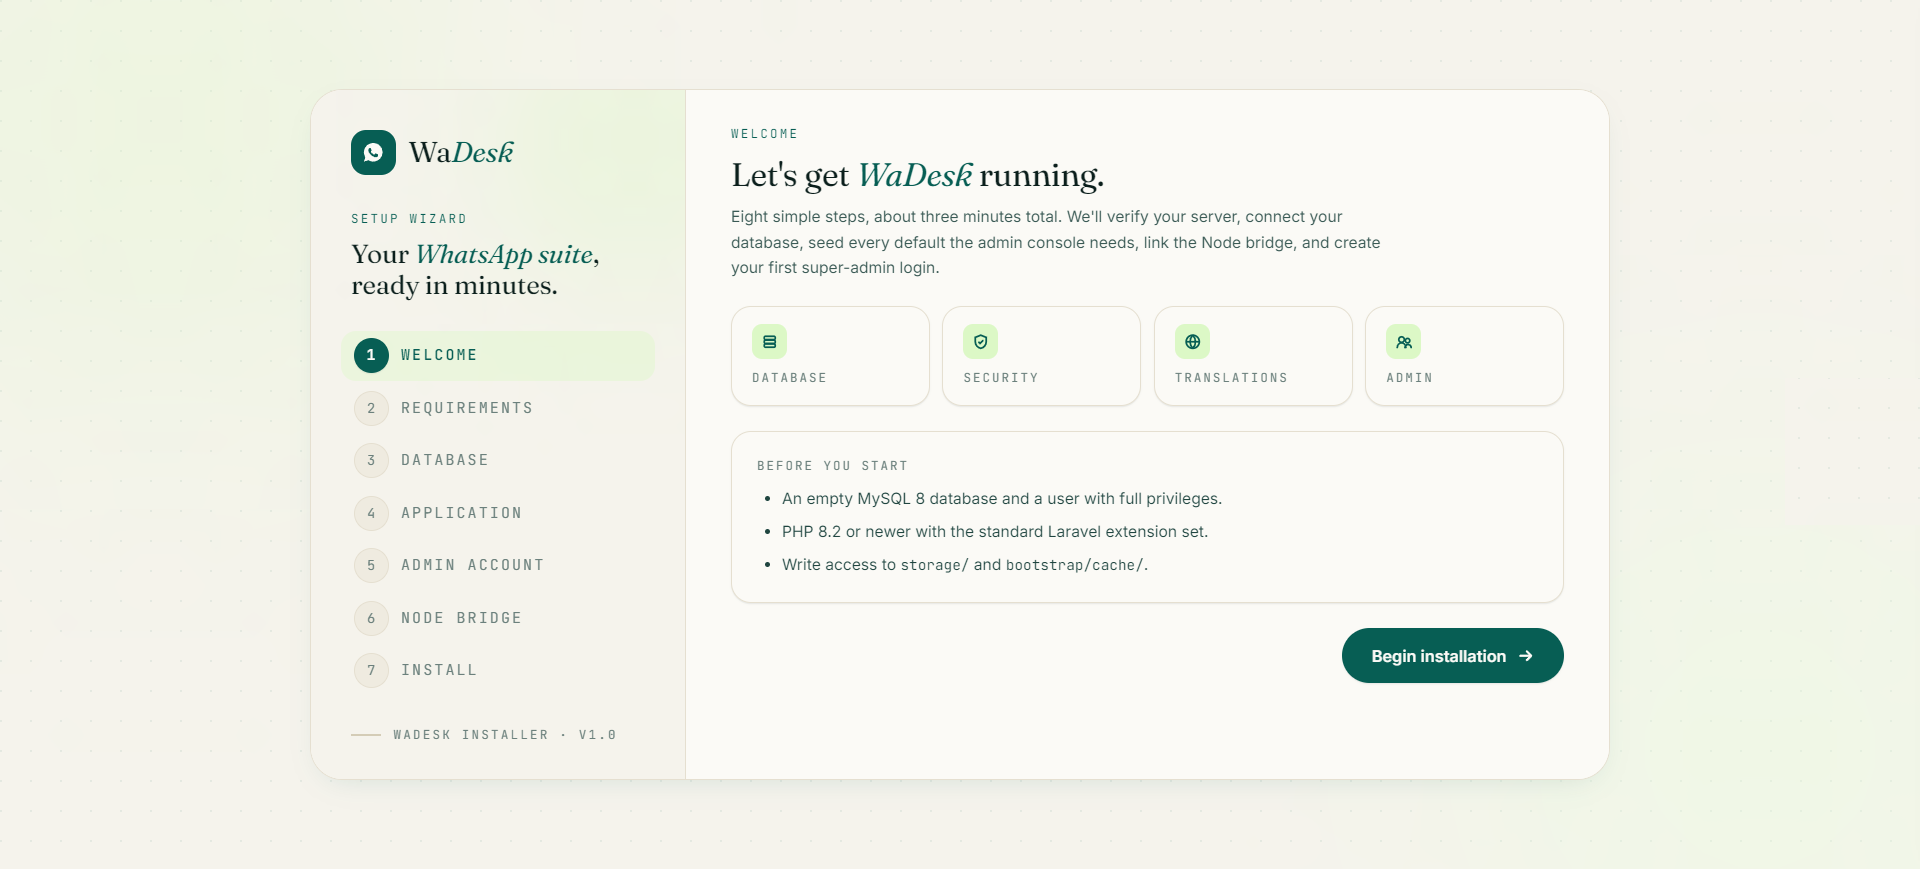
The opening screen introduces the process: "Eight simple steps, about three minutes total." It summarises what the wizard will do (verify the server, connect the database, seed defaults, create your admin login) and shows a short pre-flight checklist:
- An empty MySQL 8 database and a user with full privileges.
- PHP 8.2 or newer with the standard Laravel extension set.
- Write access to
storage/andbootstrap/cache/.
Click Begin installation to continue.
Step 2 — Requirements
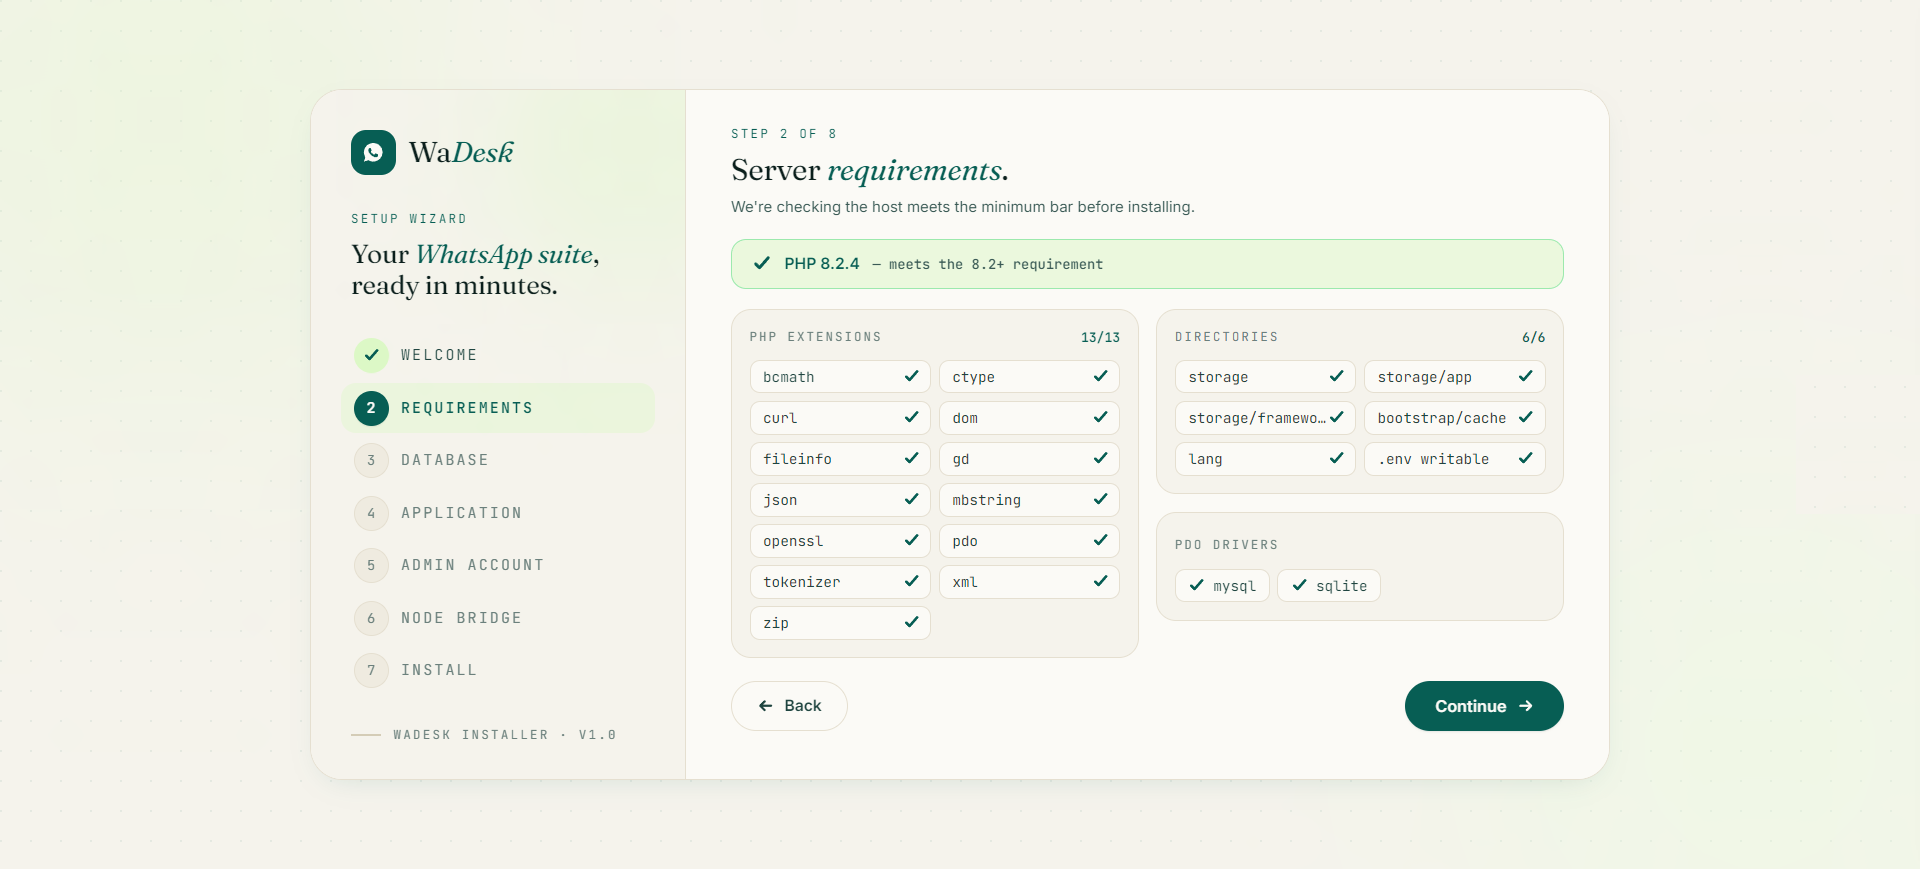
The wizard runs a live environment check against the host. You will see:
- A PHP version banner — green if you are on 8.2+, red if not.
- A PHP extensions grid with a tick or cross for each required extension (with an
n/totalcounter). - A Directories panel confirming each writable path (
storage,storage/app,storage/framework,bootstrap/cache,lang, and.envwritability). - A PDO drivers panel that must list
mysql.
The Continue button is only enabled when every item passes. If something is marked in coral (red), fix it on the server, then reload the page — the check re-runs automatically. When everything is green, click Continue.
Most common blocker: a missinggdorzipextension, or a non-writable.env. Enable the extension in your PHP settings or fix folder permissions, then refresh. See Troubleshooting for the exact fixes.
Step 3 — Database Connection
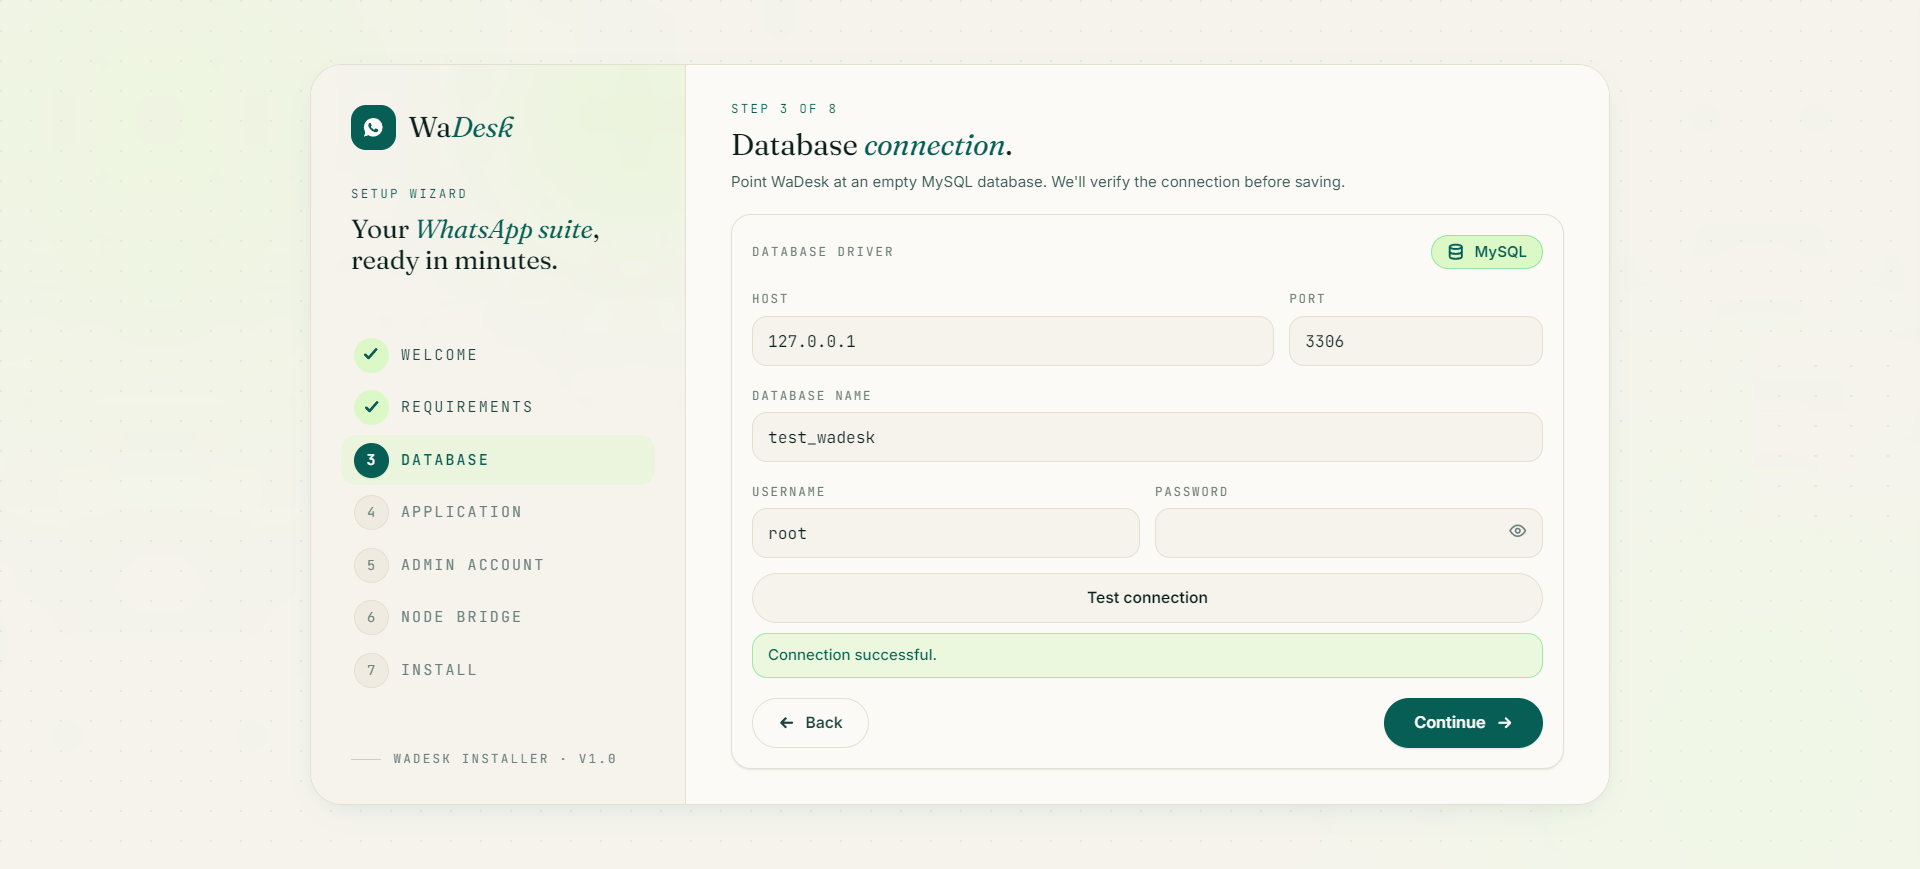
Point WaDesk at your empty database. MySQL is the only supported driver (shown as a fixed badge). Fill in:
| Field | What to enter | Typical value |
|---|---|---|
| Host | Database server address | 127.0.0.1 or localhost |
| Port | MySQL port | 3306 |
| Database name | Your empty database | wadesk |
| Username | Database user | your DB user |
| Password | That user's password | (your password) |
Click Test connection first. The wizard opens a live PDO connection and shows a green "Connection successful" message, or a red error with the exact reason if it fails. Once the test passes, click Continue — your details are held in the install session (not yet written to disk).
Tip: If the test fails, the most common causes are a wrong host (use127.0.0.1instead oflocalhoston some hosts), a user without privileges on that database, or the database not existing yet.
Step 4 — Application Basics
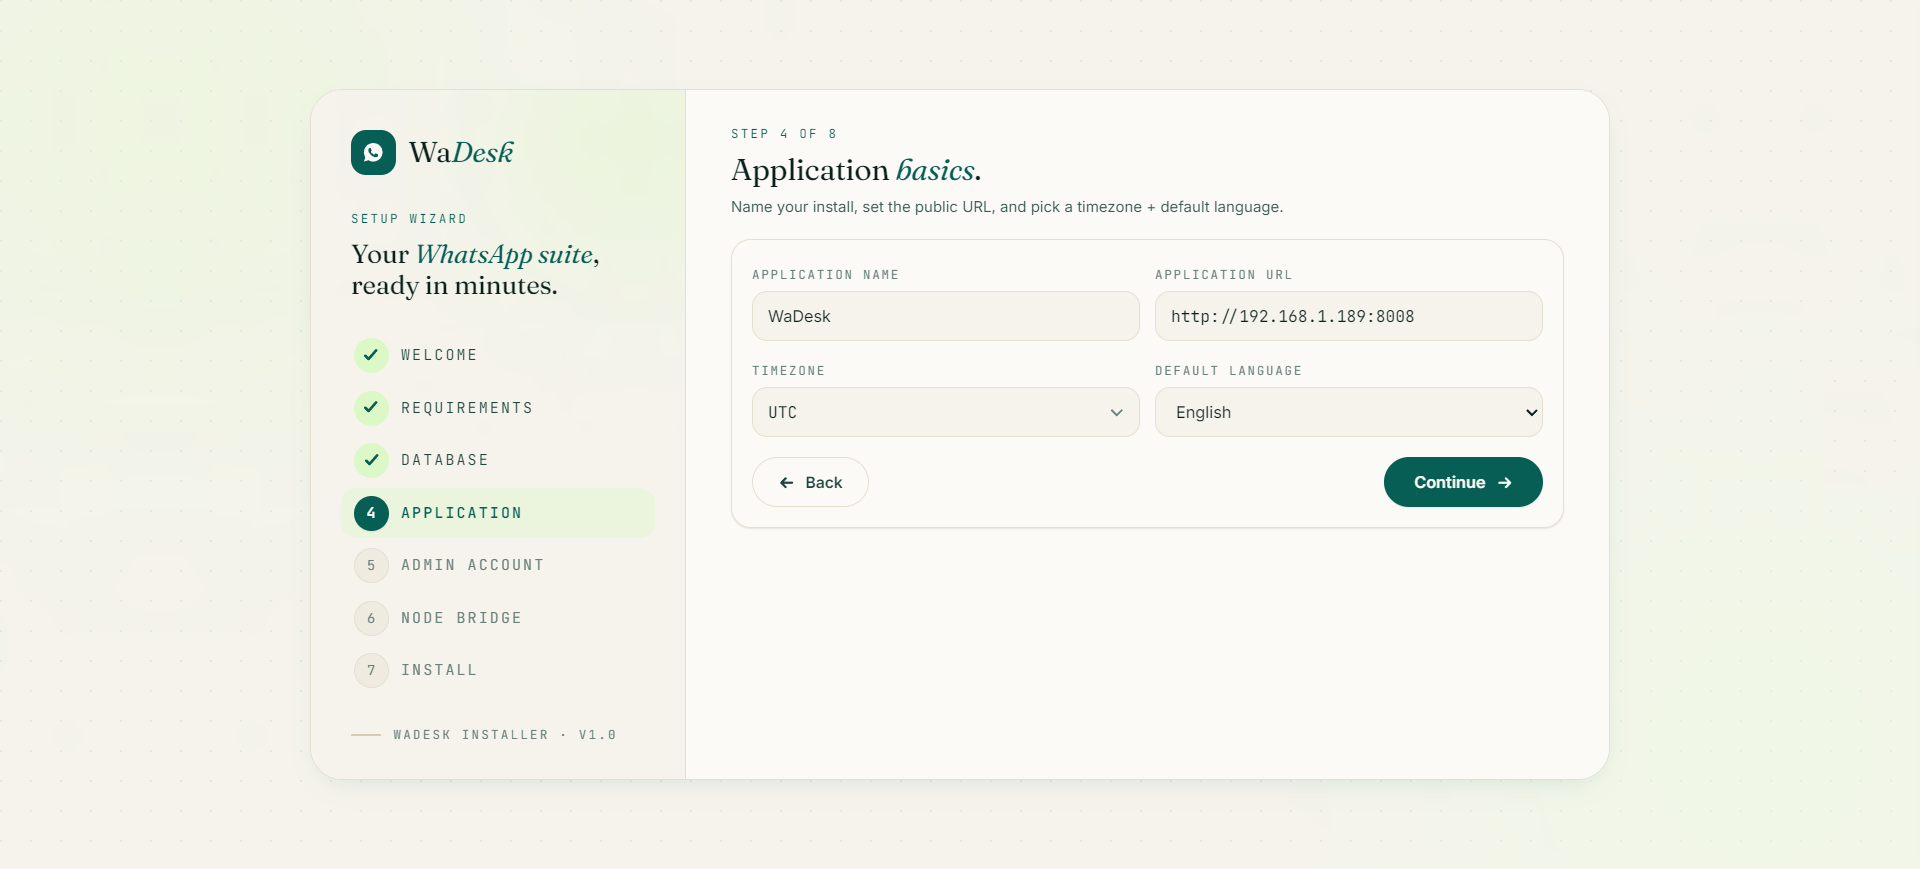
Name your install and set its public identity:
| Field | Purpose |
|---|---|
| Application name | Shown across the app and in branding (you can rename it later in the admin panel). Defaults to "WaDesk". |
| Application URL | Your full public URL, e.g. https://app.example.com. Used to build links, webhooks, and redirects — get this right. |
| Timezone | Searchable list of all timezones; sets the default for scheduling and timestamps. |
| Default language | The starting interface language (English, Spanish, Hindi, Arabic, and many more are bundled). |
Click Continue. These values are saved into your configuration during the install run.
Step 5 — Admin Account
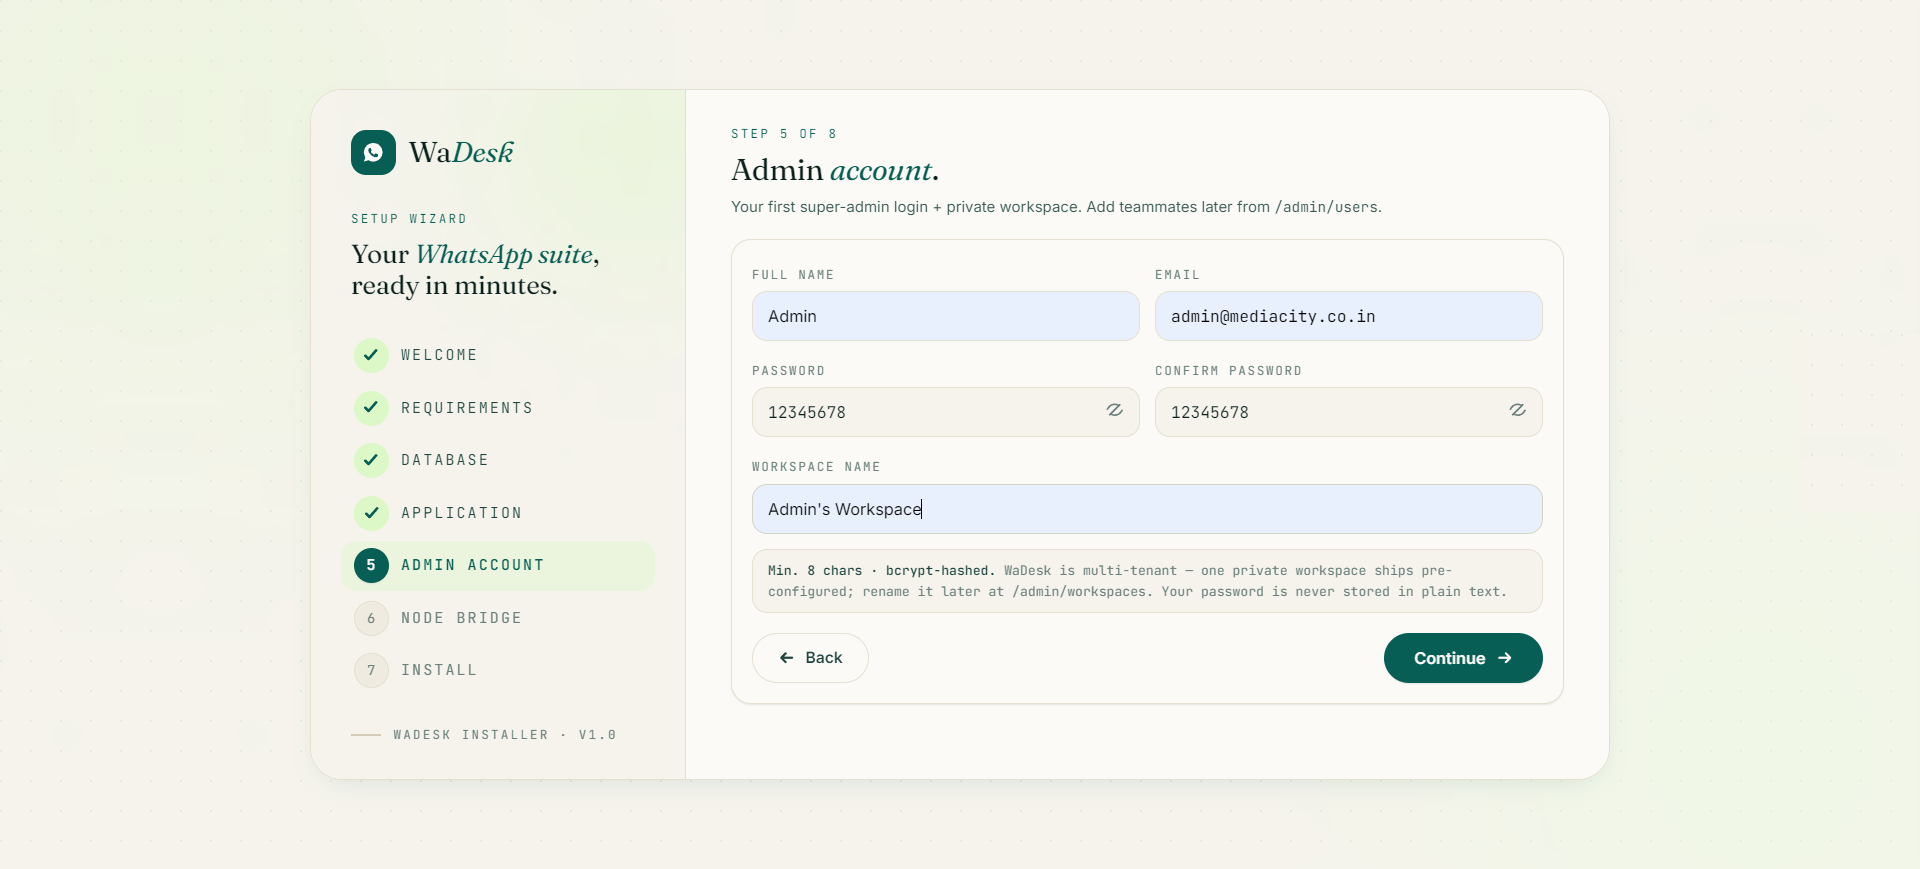
Create your first super-admin login and its private workspace:
- Full name — the admin's display name.
- Email — your login email (also where password recovery would go once SMTP is configured).
- Password and Confirm password — minimum 8 characters; stored securely (hashed, never in plain text).
- Workspace name — WaDesk is multi-tenant, so your admin account ships with one private workspace pre-configured. You can rename it later from the admin panel.
Click Create admin & install to move to the install run.
Save your password now. The wizard never displays it again and does not keep it in the session beyond this step. Email recovery requires SMTP, which is configured later — so store the credentials in a password manager immediately.
Step 6 — Node Bridge
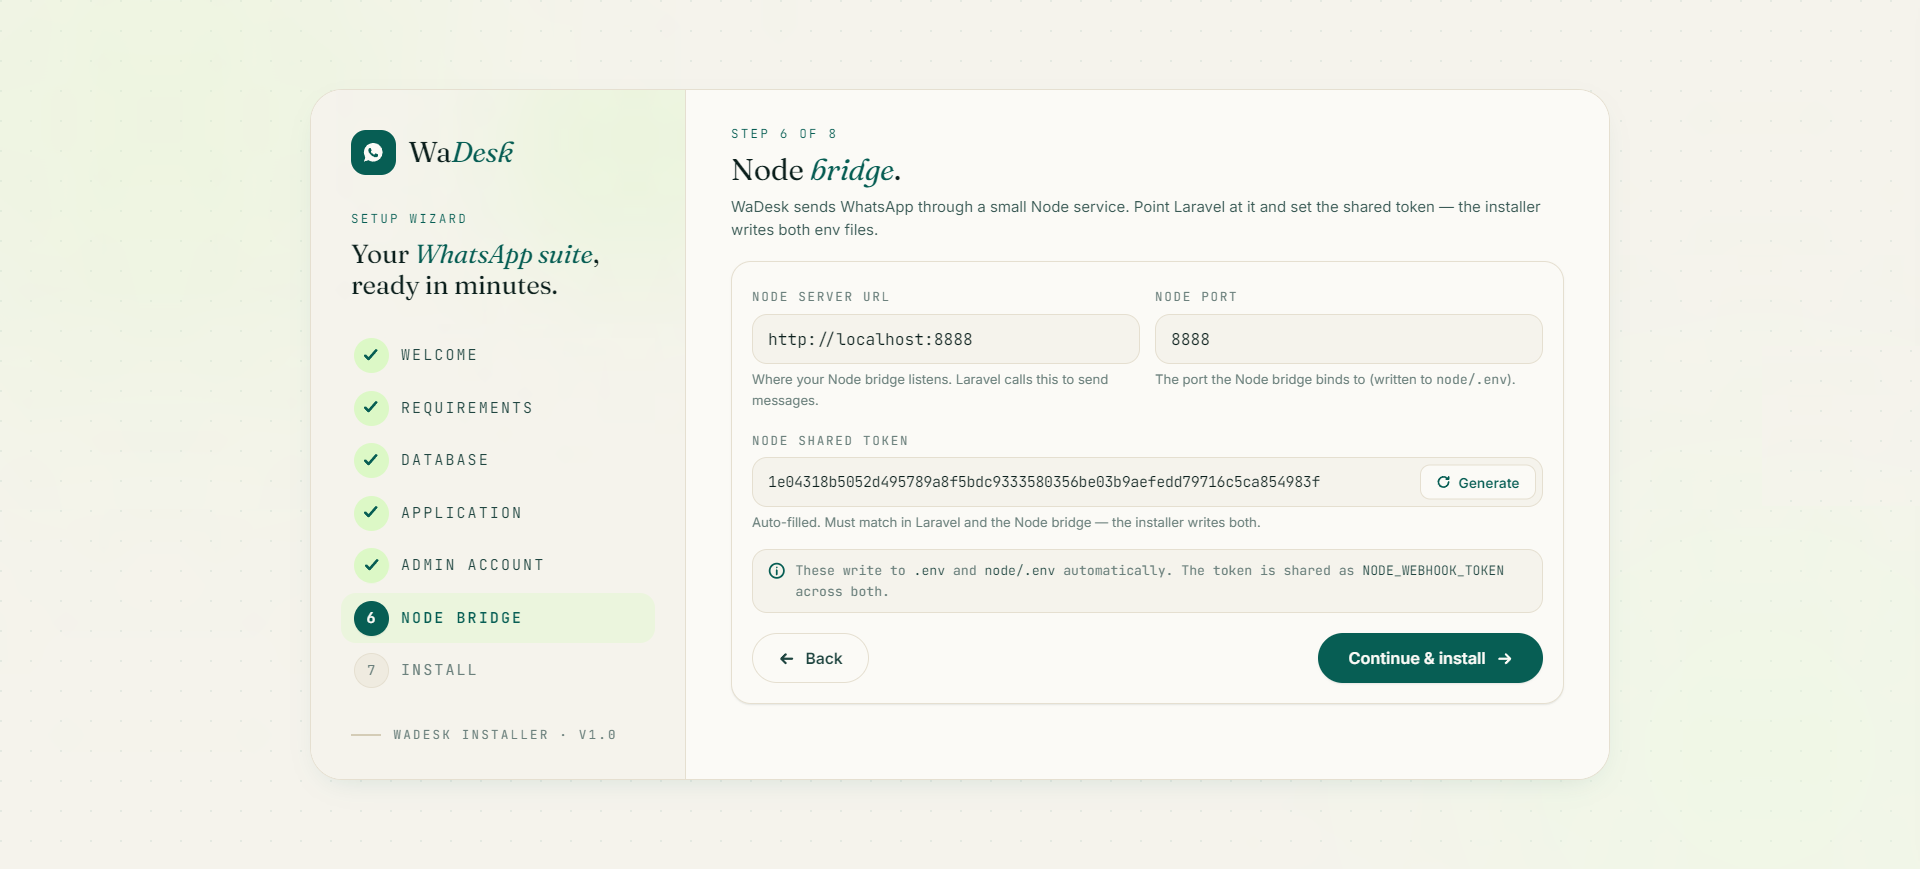
This step wires WaDesk to its Node helper service (the Unofficial-API bridge) for you. Nothing has to be matched up by hand afterwards — the wizard writes both environment files and uses the same shared secret on each side, so the two halves can always talk to each other. Fill in three fields:
| Field | What to enter | Typical value |
|---|---|---|
| Node server URL | Where the Node bridge listens. WaDesk sends messages to this address. | http://localhost:8888 |
| Shared token | The secret WaDesk and the bridge use to authenticate each other. Auto-generated — leave it as is, or paste your own. | (pre-filled) |
| Port | The port the Node bridge listens on. | 8888 |
When you continue, the installer writes the configuration to both sides automatically:
- Into WaDesk's Laravel
.env:SERVER_URL(the Node server URL),NODE_WEBHOOK_TOKEN(the shared token), andAPP_URL. - Into the bridge's own
node/.env(which lives inside the app folder):PORT,APP_DOMAIN_NAME(your app URL), and the sameNODE_WEBHOOK_TOKEN.
Because the installer writes the identical token to both files, the shared secret matches by construction — there is no manual copy-paste step and nothing to keep in sync.
It's all wired for you. You no longer edit any .env by hand, set a CORS allowed-origins list, or paste the server URL into the browser extension. The installer handles the Node bridge environment, the shared secret, and the extension URL automatically.
Step 7 — Installing

This screen runs the actual installation as a sequence of six sub-steps, each shown with a live progress bar and timing. The wizard runs them one at a time so that if any sub-step fails, you can fix the cause and retry from exactly that point — without losing earlier work.
- Configuration written — saves your settings, generates the app encryption key, and creates the shared secret the Node helper service uses to talk to WaDesk.
- Database tables created.
- Essential data loaded — roles & permissions, subscription plans, currencies, payment gateways, translation providers, checkout defaults, and the in-app guidebook.
- Admin + workspace ready — creates your super-admin user and their private workspace, with you as the owner.
- File permissions set — links public storage and creates the call-recordings folder.
- Installation finalized — clears caches and writes the
storage/installedmarker that locks the wizard.
The whole run usually takes 20–40 seconds. If a step fails, the wizard pauses and shows the error plus a Retry from failed step button. On success it shows "Installation complete" and takes you to the final screen automatically.
Safe to retry: Each data-loading step can be re-run safely, so retrying a failed install will not create duplicate plans, roles, or gateways.
Step 8 — Complete
The final screen confirms "WaDesk is live" and shows three cards: your admin panel URL (your domain + /admin), your admin email, and your workspace name. It also reminds you to save your credentials and offers two buttons: Open admin panel and Go to login.
It lists suggested next steps as well:
- Connect a WhatsApp number from the Devices screen (Unofficial API QR or Cloud API sign-in).
- Add your AI keys under Admin → API Keys.
- Set up payment gateways under Admin → Payment Gateways.
- Set platform branding (favicon + logos) under Admin → Settings → General.
Those tasks are covered on the next page, Post-Install Setup.
The Installer Locks Itself
Once installation finishes, WaDesk creates a storage/installed marker file. From then on, any attempt to visit /install simply redirects back to the homepage — the wizard cannot be run a second time on a live install, so your data and admin account are safe.
Re-running the installer (advanced): Only delete storage/installed if you intend to wipe and reinstall from scratch on an empty database. Re-running the wizard against a populated database is not supported and is not necessary for normal use or updates.